
티스토리 뷰
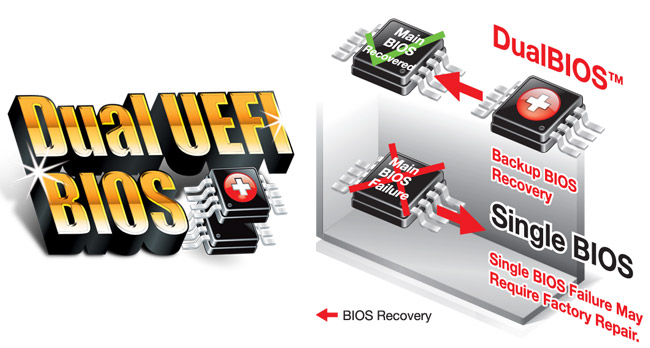
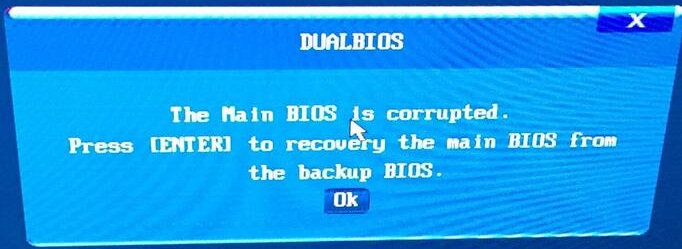
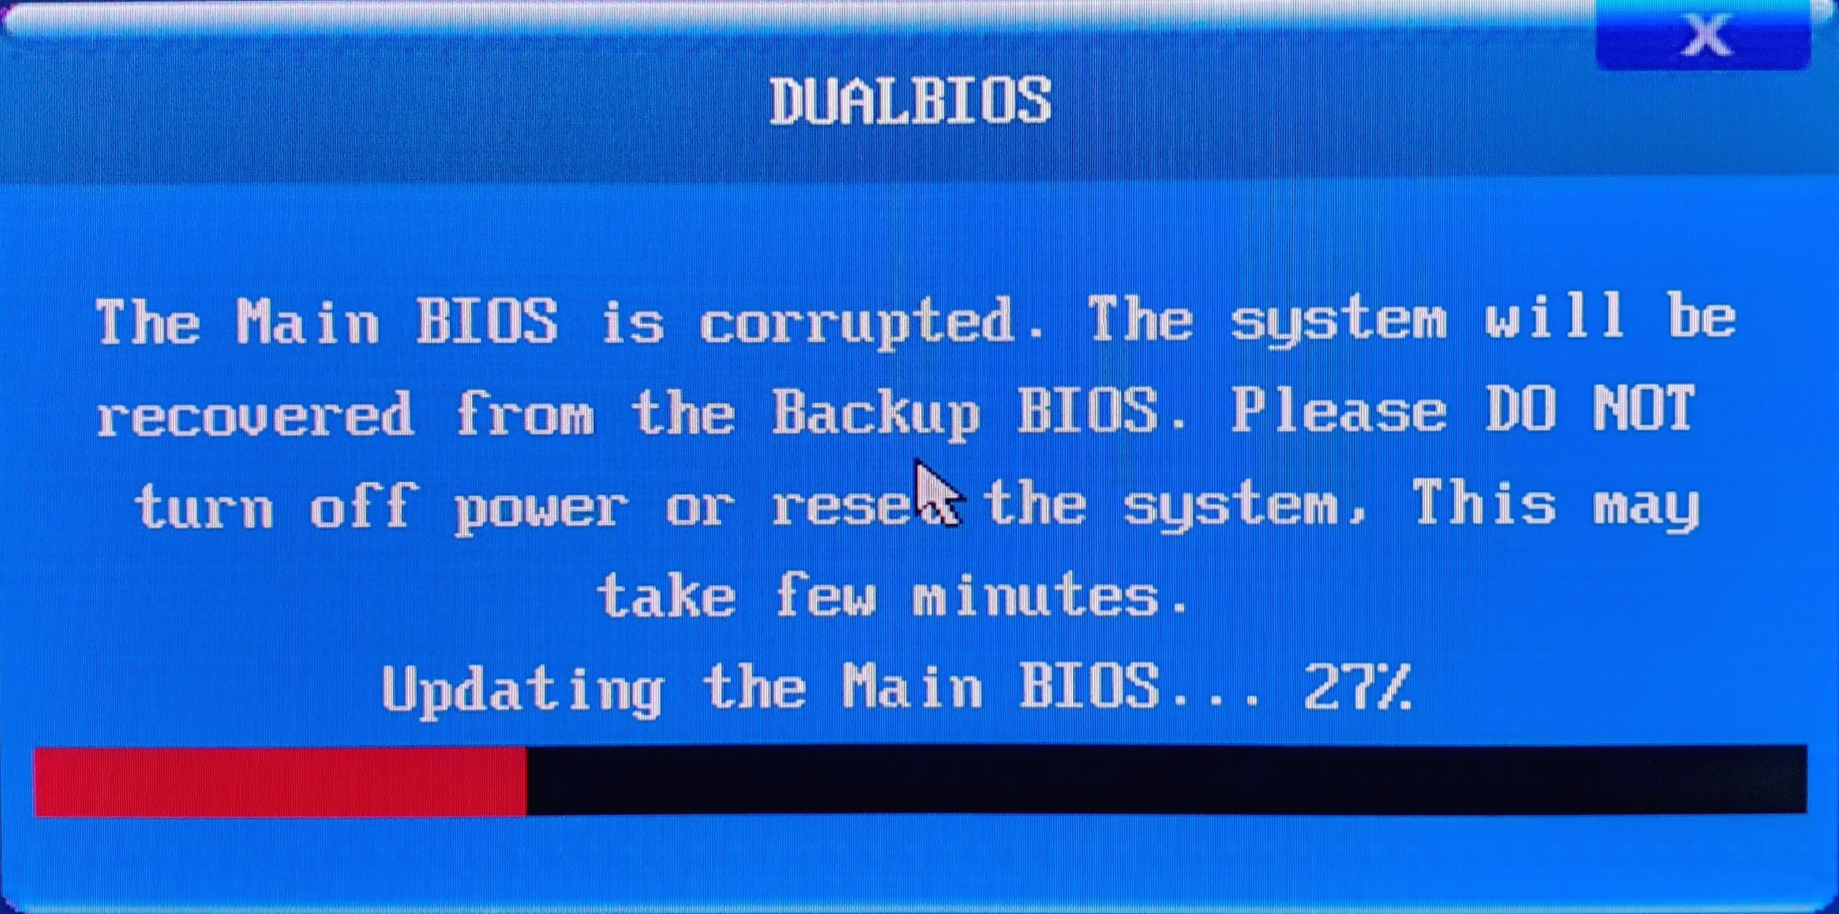
GIGABYTE mainboard는 DualBIOS로 main BIOS에 오류가 생기면 backup BIOS로 자동 복구 가능하도록 되어 있습니다.
-- GIGABYTE --Geeks Column of the Week - BIOS Explained
하지만 가끔은 자동복구 기능이 작동하지 않고 부팅 중 GIGABYTE - UEFI DualBIOS 문자열만 나오는 청색 화면이
반복적으로 나타날 수가 있습니다.
이하 모든 경우에 main BIOS가 손상되었다고 가정하고 BIOS 복구에 대해 알아보겠습니다.

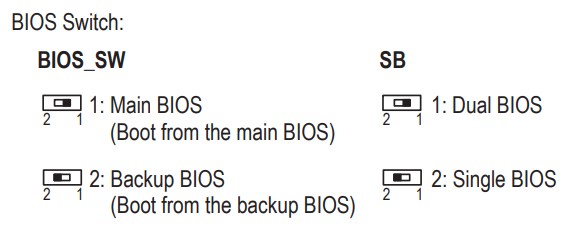
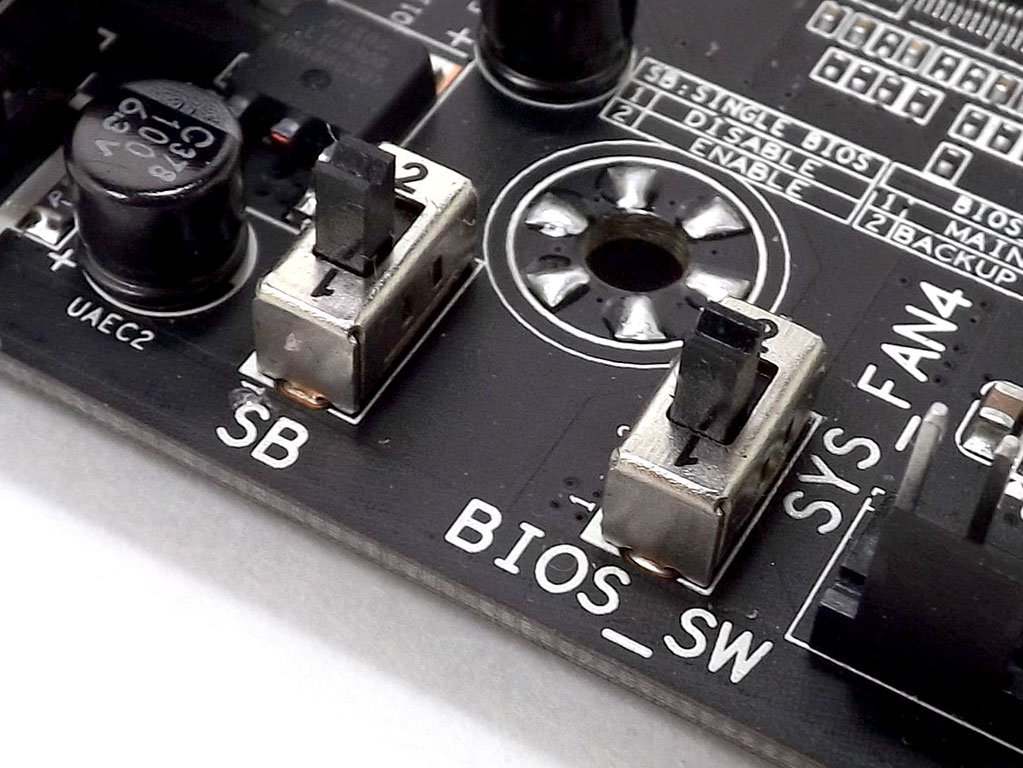
1. BIOS_SW와 SB switch가 있는 경우
How to fix corrupt BIOS ROM with BIOS Switch (BIOS_SW)? | FAQ - GIGABYTE Global
- Turn off the computer.
- Adjust SB switch to Single BIOS mode.
- Adjust BIOS switch (BIOS_SW) to the functional BIOS(backup BIOS).
- Boot up the computer and enter BIOS mode to load BIOS default setting.
- Adjust BIOS Switch (BIOS_SW) to the non-working BIOS(main BIOS).
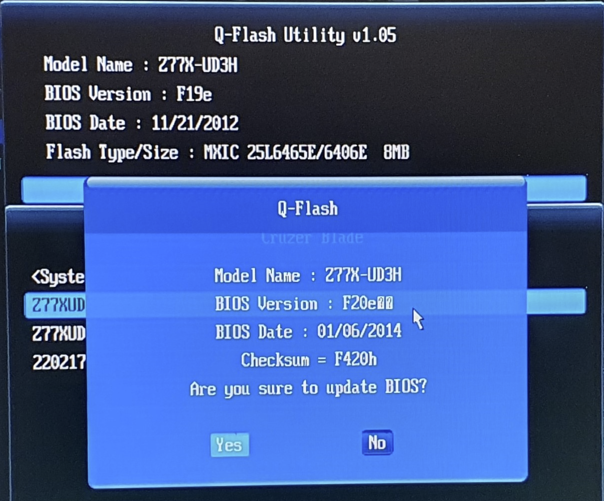
- Flash the BIOS by using Q-Flash.
- Reboot and confirm if BIOS is working.
- Shut down the computer and adjust BIOS Switch (BIOS_SW) to original BIOS(main BIOS).
- Boot up the computer and confirm BIOS are working properly.
2. BIOS_SW는 있으나 SB switch가 없는 경우
기본적으로 1번과 동일합니다.
BIOS_SW를 backup BIOS로 변경 후 부팅합니다.
backup BIOS로 정상 진입이 되면 BIOS_SW를 main BIOS로 변경합니다.
다운로드한 BIOS 파일을 Q-Flash 하면 현재는 main BIOS가 선택된 상태이므로 main BIOS를 복구할 수 있습니다.
3. BIOS-SW와 SB switch가 모두 없는 경우
※ 반드시 PS2 키보드를 사용해야 합니다. USB 키보드는 작동이 보장되지 않습니다.
※ ALT key는 좌측이 안되면 우측이 되는 경우도 있다 합니다.
※ BIOS Swap - CTRL+F10
1) main BIOS와 backup BIOS의 data를 서로 맞바꿈
2) BIOS chip을 서로 바꾸어 인식하는 것이 아니고 data만 서로 맞바꿈
※ Backup BIOS reflash - main BIOS에서 backup BIOS로 copy(반대는 안됩니다)
1) ALT+F10 -- UEFI BIOS
2) ALT+F12 -- AWARD BIOS
BIOS_SW와 SB switch가 없는 경우는 무조건 main BIOS로 부팅해야 되는 상황입니다.
이 경우 BIOS swap과 BIOS copy를 이용해야 됩니다.
먼저 손상된 main BIOS와 정상 backup BIOS를 서로 맞바꾸어야 됩니다(BIOS swap).
부팅할 때 CTRL+F10을 눌러 main BIOS와 backup BIOS를 swap 합니다.
그러면 정상 상태의 backup BIOS의 data가 손상된 main BIOS chip으로 복사됩니다.
당연히 backup BIOS chip에는 손상된 main BIOS data가 복사됩니다.


재부팅하면 main BIOS(backup BIOS의 정상 data가 복사된 상태)로 부팅하게 됩니다.
main BIOS가 정상적으로 작동이 되는지 확인합니다.
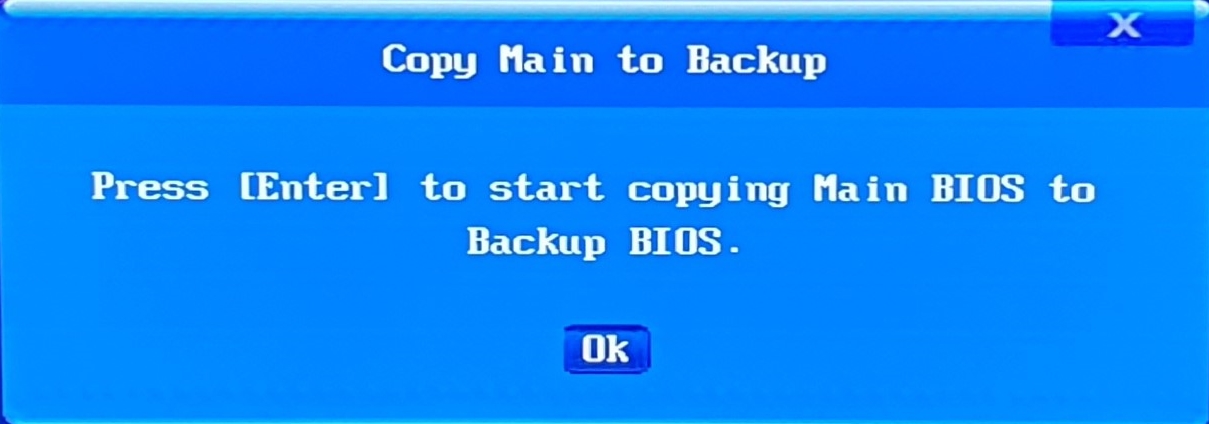
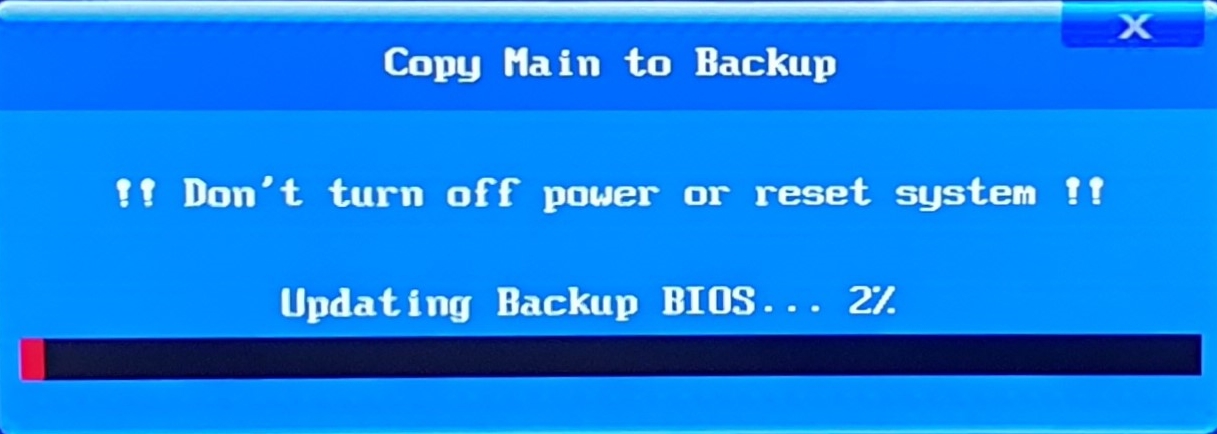
정상 작동이 되면 main BIOS data를 backup BIOS로 다시 복사하여 손상된 backup BIOS를 복구해야 됩니다.
다시 재부팅하면서 ALT+F10 or ALT+F12를 누르면 main BIOS data가 backup BIOS로 복사가 됩니다.

4. BIOS_SW, SB switch도 없고 CTRL+F10도 작동하지 않는 경우
강제로 정상 상태인 backup BIOS로 부팅하게 만들어주어야 합니다.
How to Repair Corrupted BIOS Firmware: 7 Steps (with Pictures) (wikihow.com)
Method 1:
Power your computer off.
Then press and hold the power button until your computer powers back on.
Continue to hold the power button until the computer powers off again.
When you power it back on, it should boot from the backup BIOS.
Method 1-1:
disable PSU power, hold front power button,
enable PSU, when fan starts, disable PSU,
repeat 3 times (without releasing front power button)
and it will go to recovery screen and it will flash bios
Method 2:
Power your computer off.
Press and hold the Power button and the Reset button for about 10 seconds and release.
When you power your computer on a third time, it should boot from the backup BIOS.
Method 3:
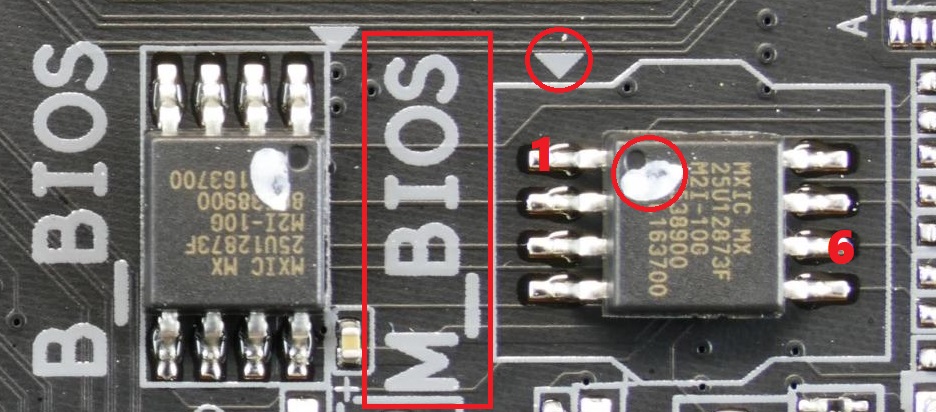
Use this method as a last resort. If you are unable to get your Gigabyte motherboard to boot into the backup BIOS using either of the two methods above, you'll need to open your computer and access the motherboard directly. Look for a chip labeled "M_BIOS" or "Main BIOS" or something similar. Use a wire or a paperclip to short Pins 1 and 6 on the chip. There should be an triangle icon or a red dot next to pin 1 (it's usually the one on the bottom right). Pins 1, 2, 3, and 4 are all on the same side. Pin 5 is directly across from Pin 4 and Pin 6 is right next to Pin 5. Place a paperclip or short piece of wire on Pins 1 and 6 and hold it steady (be sure to touch something metal before touching the inside of a motherboard.) Have another person power the computer on. Remove the paperclip or wire when you hear it beep. This should force your computer to boot into the backup BIOS.
※ main BIOS의 1번과 6번 pin을 short 시킨 상태에서 전원을 켜고 beep이 들리면 즉시 short를 중단합니다.
※ pin은 1+6, 4+7, 5+6 등이 언급이 되지만 pin 1과 pin 6으로 성공하였으니 참고 바랍니다.
- Total
- Today
- Yesterday
- system partition
- LDM
- write-caching
- UEFI
- 삼성PC
- 1MiB
- winre
- unassigned
- 쓰기 캐시 버퍼 플러싱
- SRS7
- 1mb
- 한글2022 #무인설치 #시디키 자동입력
- unallocated
- ReagentC
- multi-booting
- 일반PC
- SRS
- SRS8
- 다시 쓰기
- 할당되지 않은 공간
- Admintool
- winre.wim
- write-cache buffer flushing
- recovery
- Write Back
- 쓰기 캐싱
- LG PC
- GIGABYTE BIOS # BIOS 복구 # BIOS 손상 # BIOS pin
- 쓰기 캐시 버퍼 플러시
- LG Recovery
| 일 | 월 | 화 | 수 | 목 | 금 | 토 |
|---|---|---|---|---|---|---|
| 1 | 2 | 3 | 4 | 5 | ||
| 6 | 7 | 8 | 9 | 10 | 11 | 12 |
| 13 | 14 | 15 | 16 | 17 | 18 | 19 |
| 20 | 21 | 22 | 23 | 24 | 25 | 26 |
| 27 | 28 | 29 | 30 |